With all the crazYness going on and all the things I need to get done, I woke up and said "I need to make pink balls for my tree." So I did. I decided to have a pink tree this year. Well, not the actual tree but all of the decorations. It is looking good so far.....
Thursday, November 29, 2007
Wednesday, November 28, 2007
merry
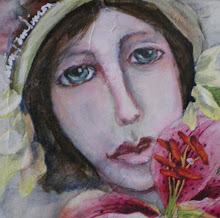
I painted this on Sunday and had my Christmas postage stamps made from it. Zazzle was having a sale and it ended on Sunday so I had to work fast. I wanted to make my Christmas cards with her but I don't know if I will have the time.
I just realized that I will be leaving again next Wednesday and I have to get a special quilt done before then. I thought I had more time. (wishful thinking)
If I am lucky I will have it near completetion tomorrow and can show and tell.
I just realized that I will be leaving again next Wednesday and I have to get a special quilt done before then. I thought I had more time. (wishful thinking)
If I am lucky I will have it near completetion tomorrow and can show and tell.
Monday, November 26, 2007
cityscape 07
I made a couple of these college paintings back in the 70's and found out that my nephew, Marc still has them and they are hanging in his home. He said he would like to have an updated one (now that he is married and has a family) so I made this for him. I thought I had some photo's of the process along the way but now I can't seem to find them. Anyway, I used to just make them on old boards and now I buy the white shelves that they sell at Home Depot and Lowes. I first paint the board, then section it into squares and paint them different (building) colors.
Then the fun begins (actually the fun begins when you start collecting the stuff to put on them.)You need a list from the person, of family and friends names and interests. Then you create a store or company for that person. For dimension and texture I use smaller boards for buildings and in the picture below you can see I used a ruler for a building. For a really cool texture I like to get the textured paint chips from the store and run it thru the sticker maker. Then I use whatever! The flag waving below is an old 4 cent stamp. Another stamp is used for an Organ Donation billboard.
I use old tickets, metal pieces, postage stamps, ect. Once you get started your mind just takes over. I even have a mini work of art (on my shop) by Tascha, a wonderful, new favorite artist of mine. Thanks Tascha!
Sunday, November 25, 2007
back again
We are back from the East Coast where the leaves were just incredible! Had a great time visiting with the family. I hope everyone had a great Thanksgiving as well.
Back to the studio tomorrow and I will show the cityscape.
Oh, and don't mind the Thanksgiving pizza below, it's just a little something my nephew, Marc and I cooked up.
Friday, November 16, 2007
Wednesday, November 14, 2007
paper quilt journal
OK, Sorry I couldn't finish this yesterday but I didn't finish the journal until today. And Blogger tends to be funny about letting me print more than 3 pictures at a time. I believe I had two more steps to go. After putting the photo's on the pages made from paper towels, let them dry and stitch around the pictures. I use the sewing machine.(it does not hurt the machine) Then put holes on the ends and put the pages in the order you want them to be in.
You can also texturize your page edges with those scissor's that make fancy edges. I just cut some of my papers differently. I also left the threads loose on the ends ( I noticed that Traci Bautista did this) it makes it interesting.
I have a box of pipe cleaners that are wrapped with yarns (things I do while watching (listening) to TV). I used these to hold the pages together. ( you can also use those clip rings from the stationary store)
Then the FUN part! Get out your boxes of ribbons and yarns and just go crazy cutting them up!
I then wrap them with the pipe cleaners so that the twisted part is in the back and then just smoosh them down and voila! It's done.
So, the pages are on the top, and I have pictures on both sides. And then the finished journal.
Tuesday, November 13, 2007
paper towel art
Step 1- Paint your paper towels. I use acrylic paints and water them down pretty good. I even use my paint water when it's a pretty color.
Step 2- Dry the towels. I use my handy photo holder thingie.
Step 3- Once dry, iron the towels.
Step 4- Use stamps on the towels if desired. I like to use the foam stamps on these.
Step 5- Cut towels to the size you want. I cut mine in an 8 inch square.
Step 6- Coat with decoupage medium. I prefer Aleen's.
Step 7- Once dry, coat the other side of towel. Or not, you can sew two pages together, back to back. It all depends on how thick you want it to be. I have done both.(no preference)
While my page was wet I adhered a photo. I printed my photo's on a medium weight paper.
Cut to size.
Dried and ironed.
I made my journal pages with pictures I took of my many favorite quilts at the Houston show.
Tomorrow I will show you the last couple steps and the journal all put together.
Update on the new cityscape painting/college. It's done! And I decided to hold off showing it until the lucky recipient (that would be you, Marc!) gets to see it first.
More tomorrow.
suze :)
Monday, November 12, 2007
Thanks!
Friday, November 9, 2007
Finally!
Thursday, November 8, 2007
inchies
These are the inchies I recieved in return for my trades.
The inchie board.
INCHIES? Are a new art form. They are one inch sized pieces of art made to trade or form larger pieces of art from them. They are mostly stitched with fabric and embellished with whatever you want.I wanted to also post the 10 inchies I took to Houston to trade but Blogger doesn't want me to download them at his time. So I will put them on tomorrow.....Blogger permitting.
Thes inchies are plus sized. They are one and a half inches. I even recieved one from France.
Wednesday, November 7, 2007
goodies
Tuesday, November 6, 2007
Monday, November 5, 2007
Subscribe to:
Posts (Atom)